


Week 11 - Assets and finishing environment layout
- Sam Ayer
- Apr 7
- 3 min read

Updated: May 5
I started this week by acting on some feedback I had received in a previous week on my table asset: It felt slightly too stylised and that there were some shading issues on the top metal parts of the table. I amended these issues by taking the high poly back into Zbrush to ZRemesh it to a low poly. This time I turned off the "adapt" mode on the ZRemesher so it would soften the asset less each time I remeshed it. This is what was making it look stylised last time. I then used the Move brush and the HPolish brush to give the new low poly asset some harder edges. I then re-did the UV unwrapping for the low poly and fixed the shading issues by doing this.
I retextured the model in Substance Painter and used extra edgewear generators to really define the edges and wood damage sculpted in the high poly. I then took it into my Unreal Engine project.

I next began creating a new asset for my project. I used an article on a project (Aleksander Goryachev, 2026) as an example of well made props in an environment to come up with a new asset idea. I decided to make a large cupboard to continue the furniture collection in my project, and to act asanother place that possessions could have been stored before the dungeon was abandoned.
I began by researching references (Thehoarde.com, 2026) and then created the low poly in Maya and created the high poly in ZBrush. I modelled the doors separate to the rest of the model so that I could move them and create a variation of the model with open doors when it was in my project. I downloaded some wood alphas (FlippedNormals, 2018) to create the wood grain across the surface. I created my own custom alpha which I printed on to various areas of the cupboard to act as an intricate detail which had been carved into the wood.

I created a wood material for my cupboard which contained many different areas of wear in multiple areas, and a metal material for the handles. I used a black mask and the paint brush to paint lighter edgewear around the custom alphas to enhance the carving effect.
Cupboard renders:


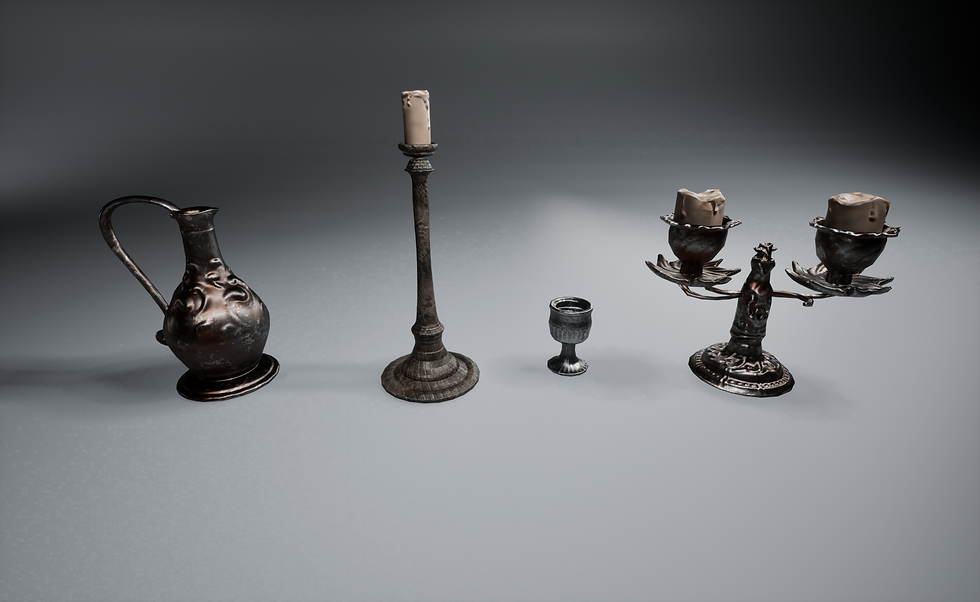
I next wanted to fill my scene with a few new smaller assets. I took a few of my high poly assets I had created for the previous character art module and used ZRemesher to retopologise them. I made them very low poly as they were only going to be seen from far away and as very small assets. I then baked the high poly onto the low and gave them new materials in Substance Painter.

I then used all the assets I had so far created this week to put together the last room in the dungeon which I had not constructed yet. I used my modular wall pieces to construct the room and then added my cupboard, armour stand and table assets with the small props in and around them.
New room renders:


I also added the new assets into my shrine room as well as some extra wooden planks which came from my wagon asset.


In game renders:


I lit the room in the same way I had done before by blocking off areas of light as if it was sunlight leaking through the roofing.
I expanded the desert so the black void around my scene was no longer visible. I used the same sand and rock vertex painting material as I had done before, but added a tiling node so that it matches the scale of the rest of the scene. I added wooden planks and my rock decal to break up the tiling of the sand.


Finally this week, I added a secondary directional light and moved it to be just in front of the "sun" directional light. I coloured it red and increased the intensity. It can be seen in the renders above creating a warm effect on the edge of the shadows, just as the sun creates in real life. It also gives a better impression of an extremely hot environment with more realistic sunlight.
Examples of red glow on the end of shadows:


Bibliography:
FlippedNormals. (2018). FlippedNormals. [online] Available at: https://flippednormals.com/.
Thehoarde.com. (2026). Buy, Sell Antiques Online Website - The Hoarde. [online] Available at: https://www.thehoarde.com/ [Accessed 7 Apr. 2026].
Aleksander Goryachev (2026). How to Build and Light a Post Soviet Hospital with Different Rooms. [online] 80.lv. Available at: https://80.lv/articles/how-to-build-and-light-a-post-soviet-hospital-with-different-rooms [Accessed 5 May 2026].


Comments