


Week 9- Statues and shrine room
- Sam Ayer
- Mar 25
- 6 min read

Updated: May 5
While planning what I wanted to do during week 9, I came to the conclusion that the edges of my scene between walls and floor still felt quite empty, even with the extra rubble mesh that I had added last week. To improve this, I planned to make a brush that would generate pieces of rubble where ever I would choose. I would do this by using a foliage brush with various pieces of rubble so I could use the paint tool to apply the rubble to my scene.
First, I needed to sculpt the high poly rubble. I did this in ZBrush using mainly TrimSmoothBord brush and brushes from the Orb-Brushes pack (Vicente, n.d.).


I then decimated the high polys slightly to allow them to perform better, and exported them all into Maya. I made them each live objects and use quad draw to retopologise the high polys to create a low poly version.

All 5 pieces of rubble were going to be in one 2k texture for optimisation, so I UV unwrapped all of them and exported them into Substance Painter. I also exported them all separately so I could keep them as separate objects when I took them into Unreal Engine.

I used grunge maps and dirt generators to create a rock material for my rubble. I used a mix of brown and greys as well as adding variation to the roughness map. I exported these texture maps and applied them to the individual rock mesh in Unreal Engine. I then added the meshes to the foliage brush tool. I also imported the high poly skull that I had created in my Character Art project, retopologised it, and then added it into the foliage brush to add some more variation to the rubble.
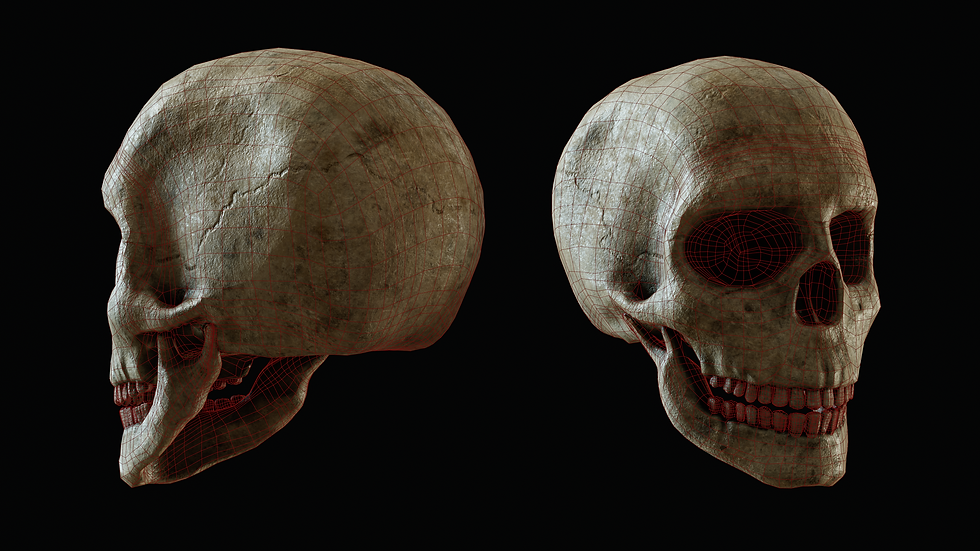

I added some randomness to the size of rubble and made the skull less common than the other pieces of rubble and then tested it out.

I then increased the density and added the rubble around my scene.


I received feedback from a lecturer who said that the walls I had in my shrine room where too rocky and didn't match the rest of the scene. He said I could benefit with more defined bricks in my scene. I therefore took my wall tiling material back into Substance Designer and added some more definition to the bricks.

Next I made a decal to add some more variation to the wall. I made a very strong grunge and mossy material in Substance Painter by multiplying grunge maps with each other.

I then took it into Photoshop to create a blurred opacity mask.

I then used the texture maps to create the decal in Unreal Engine. I used a multiply node with a colour value on the opacity map so that I could alter the opacity of the whole decal by making the colour lighter and darker. This is because the more white the opacity mask is, the more it will show, and vice versa. I made this a parameter so I can edit it and will immediately affect the decal. I made the opacity low so that the colours would blend in well with the wall while the roughness variation is still prominent.
I made a material instance so that I could alter the opacity of the decals separately depending on where they were. For example, some of the decals needed to have higher opacity where they were less visible due to lighting.


The next thing I did this week was create a world aligned layered material so that I could add moss to all the faces on my rubble facing exactly upwards. I used a university resources to teach me to do this (mural.co, 2026c). I first created a material function which would use world space projection across a mesh to evenly apply a texture while ignoring UVs. This would be the top layer material and will contain the moss texture maps I had created earlier in the project.

I next created a material which would calculate which parts of the mesh were pointing straight upwards and would apply the material function (the moss material) to the mesh in these places. The base of this material would be the rubble material which would be seen in all other places where the moss is not projected.

The final result came out well with moss being projected on all upwards facing sides.


I next wanted to created a new hero asset which would take place in my scene. I wanted to make a statue which would sit either side of my doorways which could link to the mystery and the story telling of my project. I already had a block out of a human in ZBrush which I had created for my character art project, so I took it to a new ZBrush file and moved it into a kneeling pose. I then used ZBrush's collision and gravity system to simulate a mesh being draped over the statue. I then added damage alphas (SimonFuchs, 2015) over the whole statue to give the impression it was made out of rock.


I then ZRemeshed the high poly multiple times to create a low poly for the statue, UV unwrapped the mesh and baked the high poly onto the low poly in substance painter. I used the same material as I had used on my archways for optimisation and to keep the continuity of the type of stone between all of the assets, as well as optimising the amount of materials in my project.


I then put the statues in their places around the scene and used rect lights to focus on them. This would draw the players' eyes to the statue as a focal point of the environment.


I next added some detailing to the shrine room walls by placing some of the rubble bricks in the wall to act as extruding bricks.

I received some feedback from one of my lecturers that my doorway archway needed more divisions to make it look smoother.
I took the mesh back into Maya to make this change and also added slabs to the top right and left corners to fill in empty space between the archway and the adjacent walls.
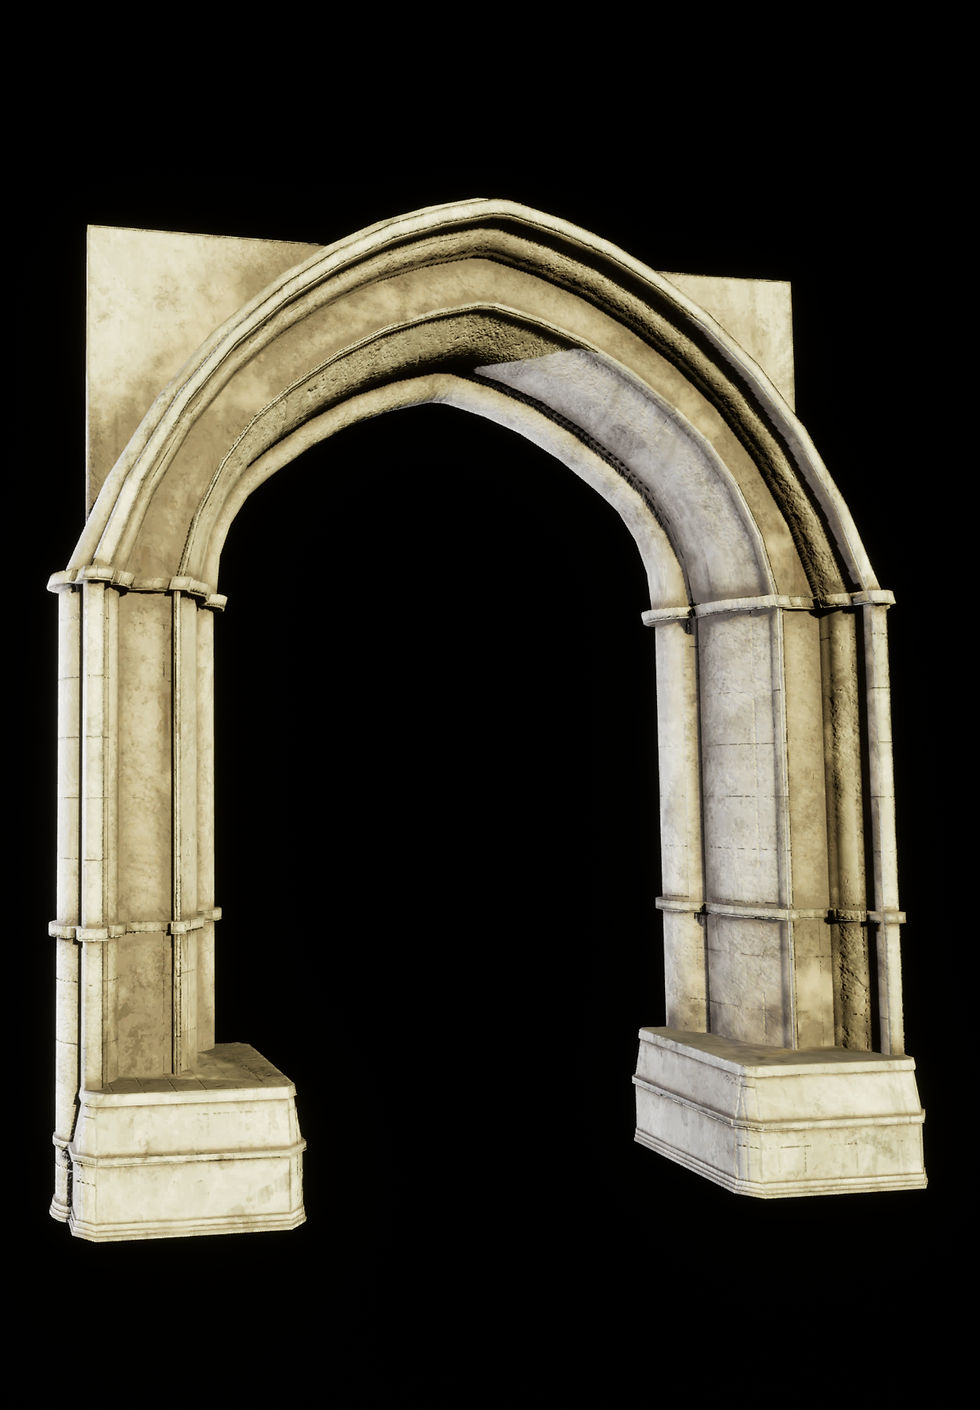
I also received feedback that my wood material in my stone and wood was too saturated and needed more colour variation. I took the trim sheet back into Substance Painter, desaturated the colours, added a wood grunge map and a clouds grunge map for albedo variation.

Finally this week, I worked on a banner that would be seen throughout my scene. I created the low poly as a plane with subtle thickness and took it into ZBrush. I then used the cloth move brushes, similarly to how I did with the carpet, to make it look like a realistic piece of fabric. I then baked the high poly onto the low, textured the banner, added a fabric effect using the fabric generators in Substance Painter, and finally created an opacity mask in photoshop to determine where I did and didn't want the banner to be seen. Using this technique I was able to carve out the shape of the banner by creating rips and tears. I then made a masked material in Unreal, applied the material maps, and applied tessellation so that I could give the banner some height information. I also created a wooden frame for it to hang on.


Drawing for games work this week:

Bibliography:
mural.co. (2026c). World Aligned Layered Material. [online] Available at: https://app.mural.co/t/gamesacademy5502/m/gamesacademy5502/1762040859983/99a191338fb1d3da30f5e1c9093b8abb8b559e7a [Accessed 22 Mar. 2026].
SimonFuchs. (2015). [ZBRUSH] – Sculpting Damage – Alphas and Brushes. [online] Available at: https://simonfuchs.wordpress.com/2015/05/24/zbrush-sculpting-damage-alphas-and-brushes/.
Vicente, M. (n.d.). Orb-brushes Pack for Zbrush. [online] Gumroad. Available at: https://orb.gumroad.com/l/nOkHw.


Comments